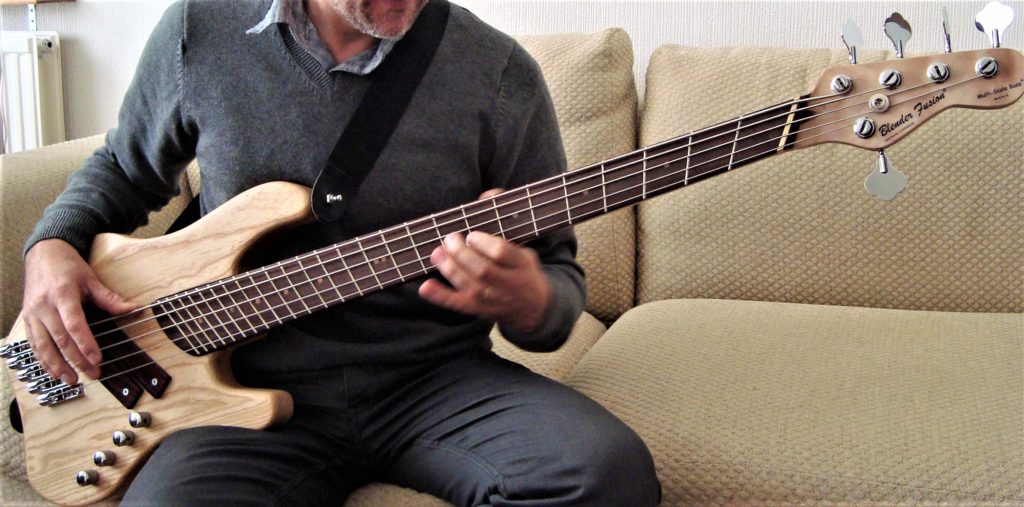
How to build a Multi-Scale 5 String Bass.![]() Included here are details, and AutoCAD dwg drawing files, for you to build your own bass guitar. This is no ordinary bass and the equivalent bought new off the shelf will set you back at least £3,500. This is what the completed guitar will look like.
Included here are details, and AutoCAD dwg drawing files, for you to build your own bass guitar. This is no ordinary bass and the equivalent bought new off the shelf will set you back at least £3,500. This is what the completed guitar will look like.
Background info![]() Traditionally bass guitars were designed with 4 strings. Adding a low B revolutionised the bass world providing a much deeper sound when required. The problem is that bass guitars were never designed for this lower tuned string. The difference between an upright piano and grand piano is the length of the bass strings. Achieving a good bass sound without unpleasant overtones requires length. On the other hand strings that produce the high notes need to be shorter for a similar reason. This is why a grand piano sound board shape is similar to a harp.
Traditionally bass guitars were designed with 4 strings. Adding a low B revolutionised the bass world providing a much deeper sound when required. The problem is that bass guitars were never designed for this lower tuned string. The difference between an upright piano and grand piano is the length of the bass strings. Achieving a good bass sound without unpleasant overtones requires length. On the other hand strings that produce the high notes need to be shorter for a similar reason. This is why a grand piano sound board shape is similar to a harp.
![]() I was planning on building my own bass guitar and found just one company in the USA that make them. So I decided to design my own in AutoCAD and then set about sourcing the materials and building it myself. The guitar looks harder to play but in reality you hardly notice the difference as the fanned frets flow with the natural movement of your hand.
I was planning on building my own bass guitar and found just one company in the USA that make them. So I decided to design my own in AutoCAD and then set about sourcing the materials and building it myself. The guitar looks harder to play but in reality you hardly notice the difference as the fanned frets flow with the natural movement of your hand.
![]() I wanted the longest possible bass so I bought the longest bass case I could find and made my guitar to fit this case. As a result the strings have to be longer than usual. These custom strings can be bought from the USA. (Side note – please get in touch or ask questions here if your need more information). Unfortunately I didn’t keep a photographic record of everything I did when building the guitar as I made it over a couple of years. In reality though you could easily make this in a month tops if you work full time at it. At the time I had no garage or workshop so most of this was built in the kitchen and lounge.
I wanted the longest possible bass so I bought the longest bass case I could find and made my guitar to fit this case. As a result the strings have to be longer than usual. These custom strings can be bought from the USA. (Side note – please get in touch or ask questions here if your need more information). Unfortunately I didn’t keep a photographic record of everything I did when building the guitar as I made it over a couple of years. In reality though you could easily make this in a month tops if you work full time at it. At the time I had no garage or workshop so most of this was built in the kitchen and lounge.
Materials used
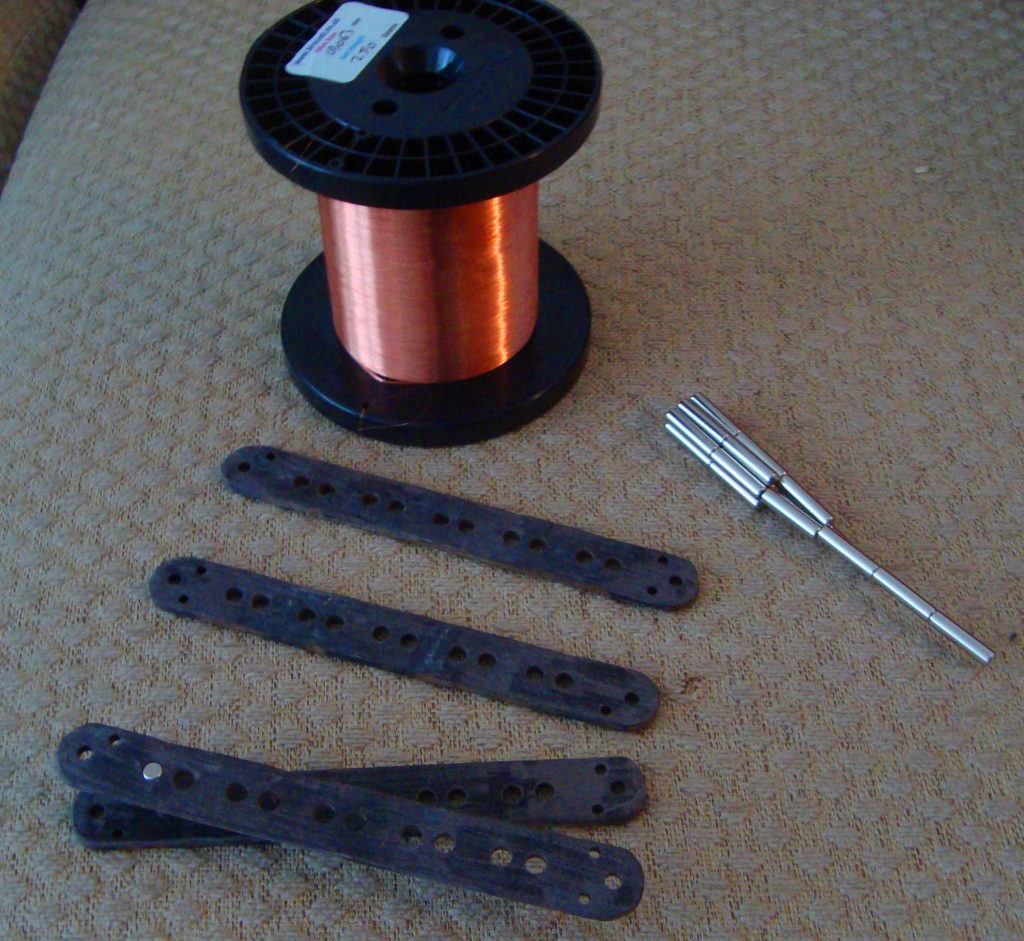
* Guitar body: American Swamp Ash.
* Guitar neck: Myrtle with a rose-wood fret-board.
* Guitar Head: Myrtle with a thin laminate of Birds Eye Maple.
* Rose-wood pickup covers.
* Dots on neck are slices of redwood dowling.
* Home made pickups (Details included here)
* Truss rod and machine heads from Ebay
* Fret wire from Ebay
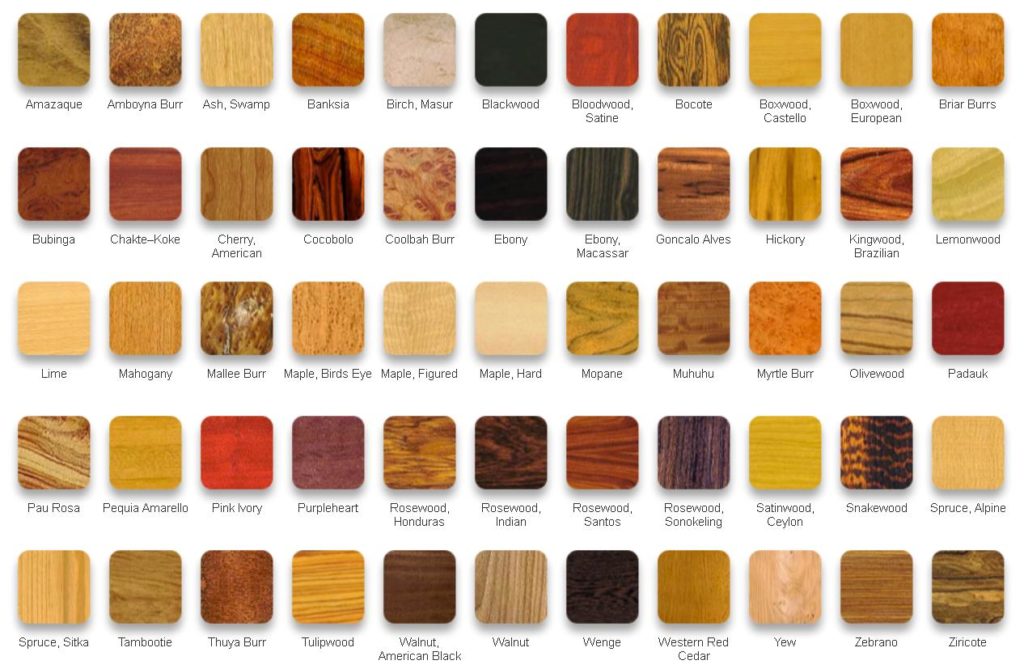
![]() I chose the tone woods. They are hard woods but lite allowing for long sustained notes. The longer length guitar will help here too. I chose Myrtle for the neck which is probably heavier than Maple but it does give a good sustained note.
I chose the tone woods. They are hard woods but lite allowing for long sustained notes. The longer length guitar will help here too. I chose Myrtle for the neck which is probably heavier than Maple but it does give a good sustained note.
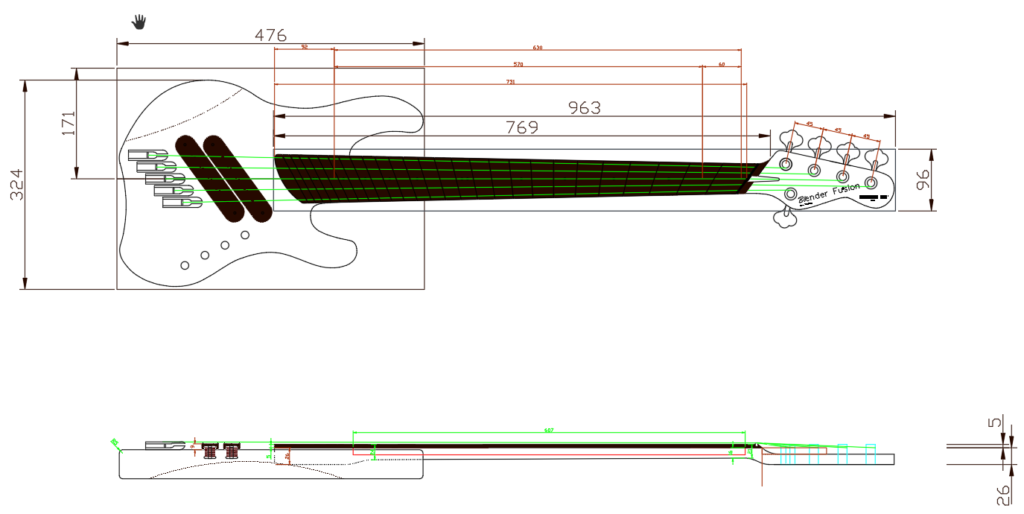

![]() Files to download (If you use them please let me know and share your creations here or our FB Page for me to see) https://www.facebook.com/Solution4m/
Files to download (If you use them please let me know and share your creations here or our FB Page for me to see) https://www.facebook.com/Solution4m/
![]() Attached here, for download, are the dwg files and pdf’s that you will need to make your guitar. There are details on what to use for the pickups and how to make them.
Attached here, for download, are the dwg files and pdf’s that you will need to make your guitar. There are details on what to use for the pickups and how to make them.
Click Here to download the drawing files in CAD dwg and pdf
![]() Some images of the guitar neck being made:
Some images of the guitar neck being made:
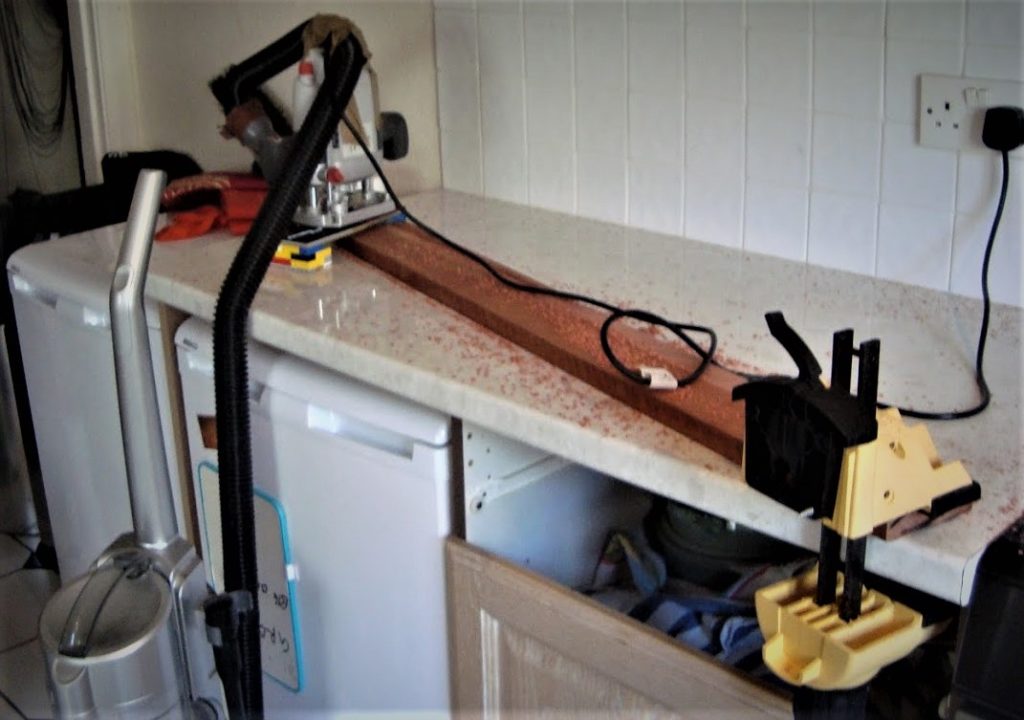
![]() Lego bricks can be very useful.
Lego bricks can be very useful.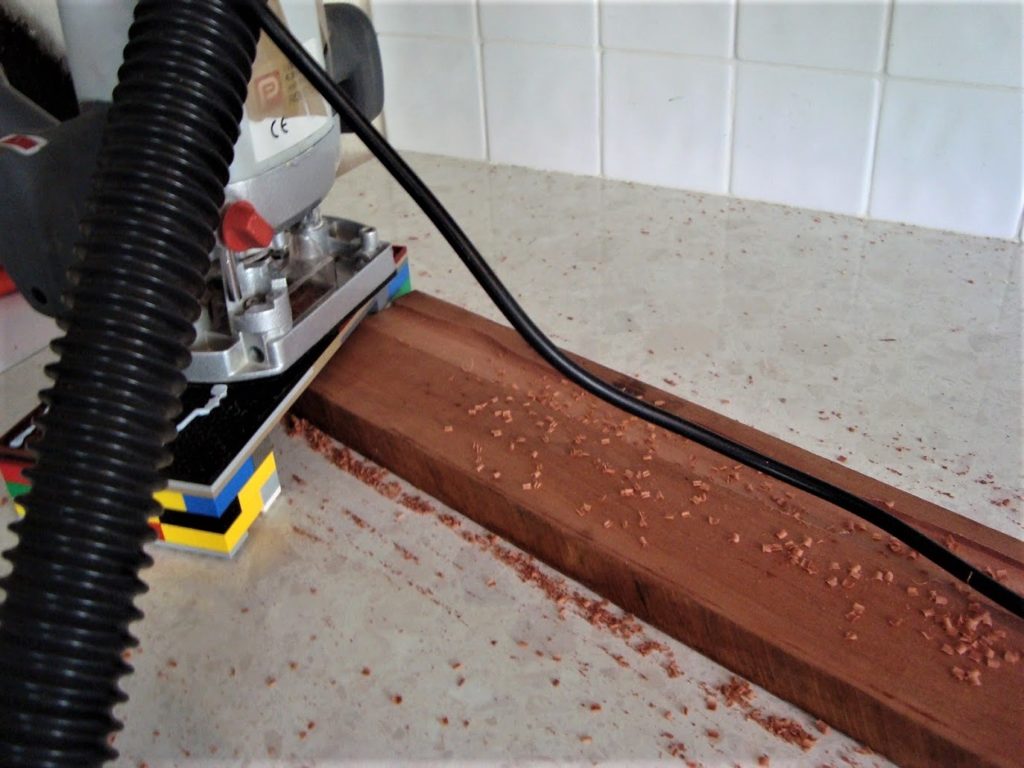
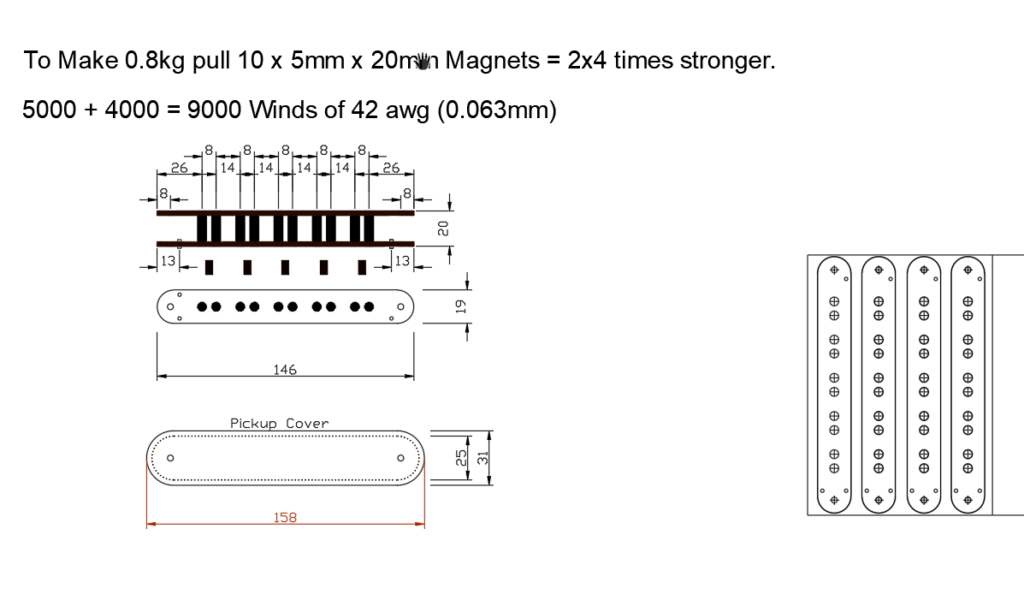
Building the pickups![]() Initially I designed each pickup with 5 magnets. I wasn’t getting enough signal generated so redesigned using 10 magnets per pickup. The magnets in one set are upside down. This means that when both pickups are on they act as hum-bucking pickups. The wiring for these are included above. Each pickup has 9,000 winding’s. I used 0.063mm coated copper wire for this. 9000 winding’s is possible by hand but you may want to consider what I did to speed up the process. In the final version I opted to use an active circuit available on eBay. However, the main wiring stays the same.
Initially I designed each pickup with 5 magnets. I wasn’t getting enough signal generated so redesigned using 10 magnets per pickup. The magnets in one set are upside down. This means that when both pickups are on they act as hum-bucking pickups. The wiring for these are included above. Each pickup has 9,000 winding’s. I used 0.063mm coated copper wire for this. 9000 winding’s is possible by hand but you may want to consider what I did to speed up the process. In the final version I opted to use an active circuit available on eBay. However, the main wiring stays the same.
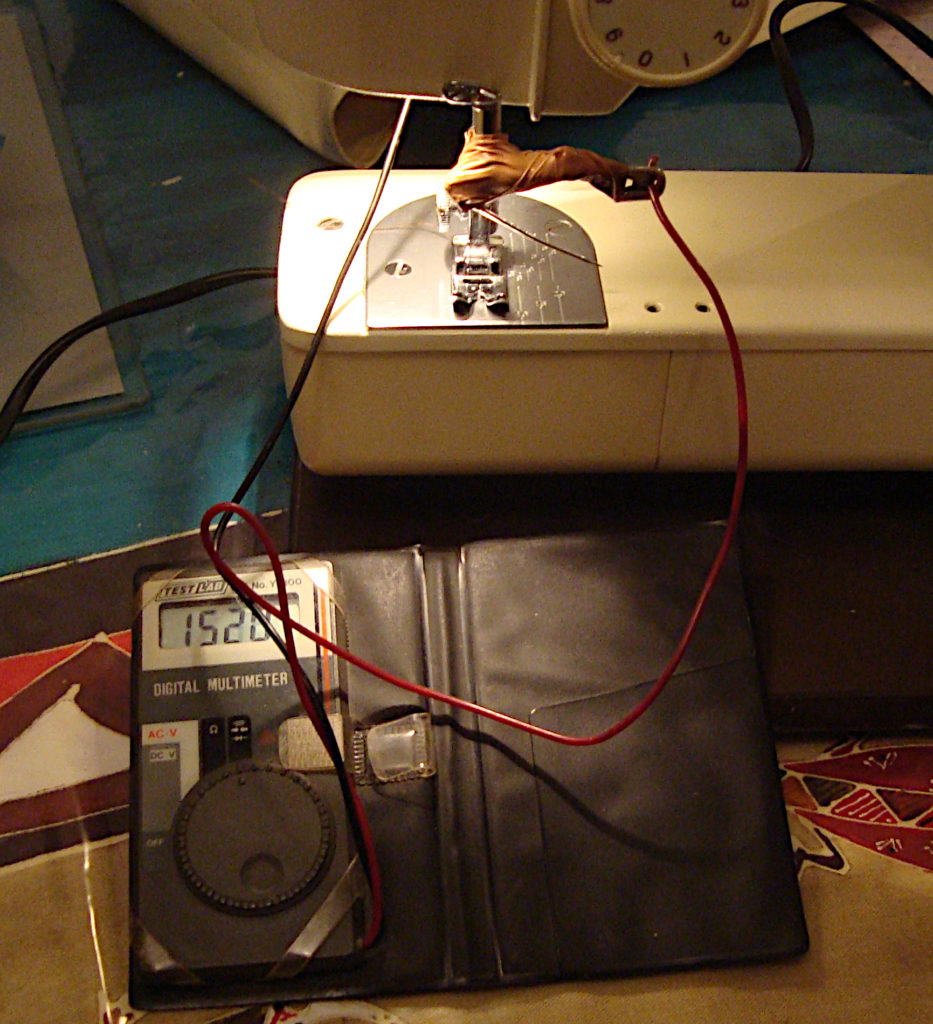
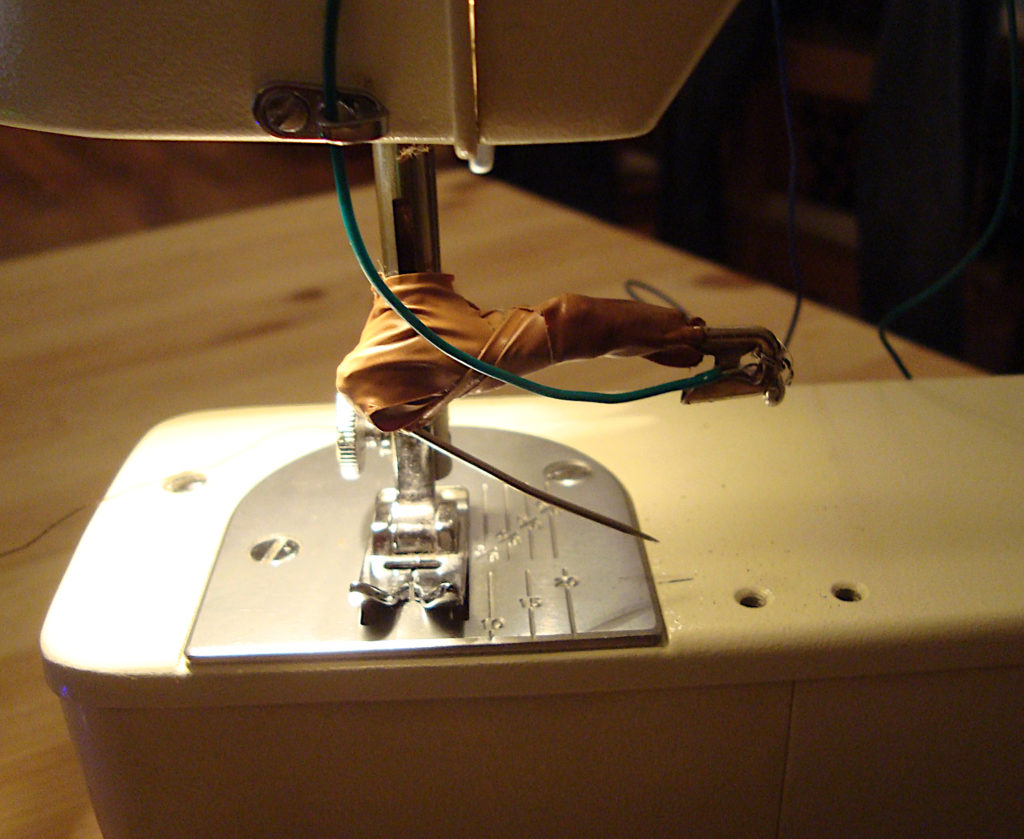
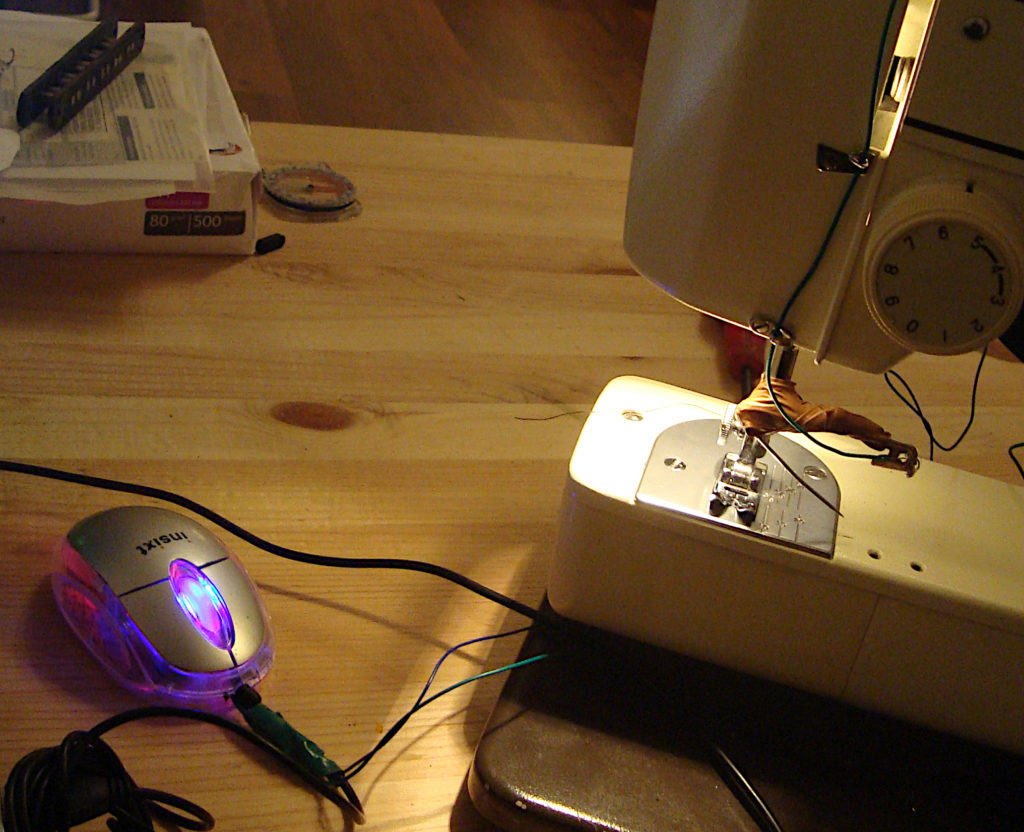
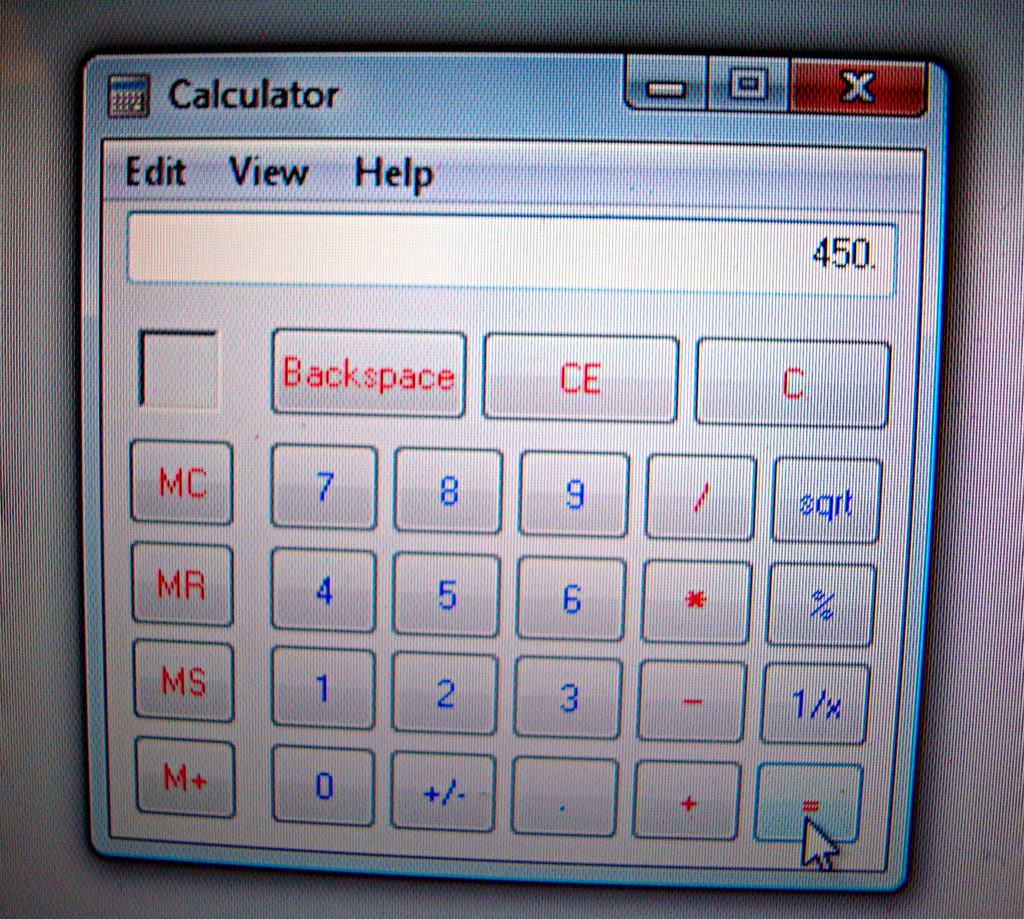
![]() The following images and short video show what is basically a very Heath Robinson approach which worked a treat for me. It involves blu-tacking the pickup to the side wheel of a sewing machine. Diverting the computer mouse wiring to a safety pin taped to the machine. The mouse button pointer is positioned over the ‘=’ button on the calculator. The calculator is set to ‘+1’ so that each time the mouse button is pressed (by the moving safety pin) the number rises. all you need is a steady hand to feed the copper wire without it breaking.
The following images and short video show what is basically a very Heath Robinson approach which worked a treat for me. It involves blu-tacking the pickup to the side wheel of a sewing machine. Diverting the computer mouse wiring to a safety pin taped to the machine. The mouse button pointer is positioned over the ‘=’ button on the calculator. The calculator is set to ‘+1’ so that each time the mouse button is pressed (by the moving safety pin) the number rises. all you need is a steady hand to feed the copper wire without it breaking.


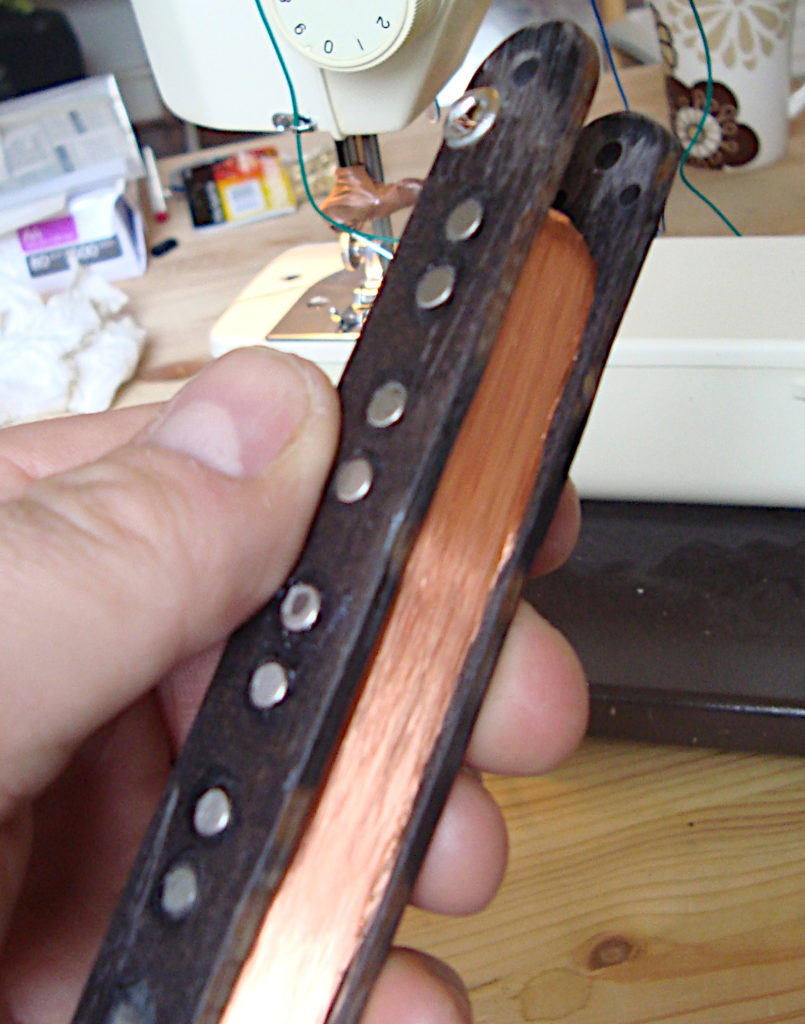
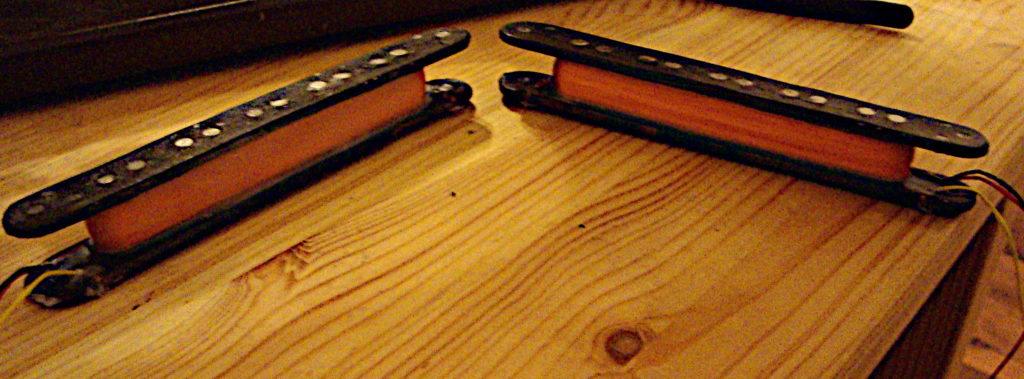
Important![]() Once you have wound the pickups and soldered all the wires into place you will need to pot the pickup by placing the whole pickup into molten wax. If you fail to do this you will get a lot of electrical interference and the wires will break very quickly. The wax holds everything in place. Below is an image of the fully potted pickups.
Once you have wound the pickups and soldered all the wires into place you will need to pot the pickup by placing the whole pickup into molten wax. If you fail to do this you will get a lot of electrical interference and the wires will break very quickly. The wax holds everything in place. Below is an image of the fully potted pickups.
![]() Should you decide to build this guitar no doubt you will have many questions. Please add your comments here and I will answer when I can.
Should you decide to build this guitar no doubt you will have many questions. Please add your comments here and I will answer when I can.
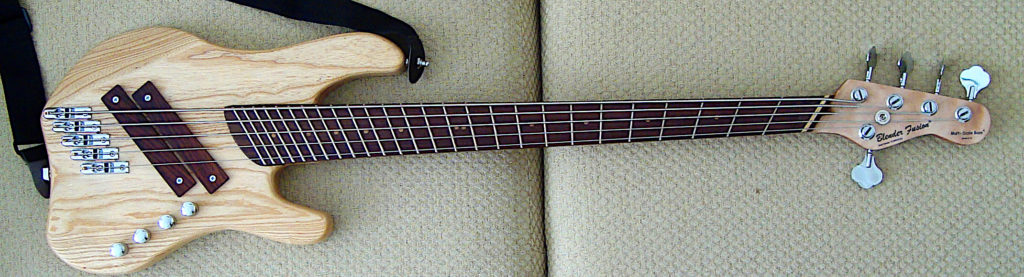
![]() I built this guitar several years ago now and its still as good as the first day I played it. Below is the guitar on the day I completed it and I have included a sampler of what the guitar sounds like in the mix. The samples are derived from songs available of our music download page.
I built this guitar several years ago now and its still as good as the first day I played it. Below is the guitar on the day I completed it and I have included a sampler of what the guitar sounds like in the mix. The samples are derived from songs available of our music download page.
![]() We also provide a bass session playing service for your songs. More can be found on this page: Bass Session Playing – Click Here
We also provide a bass session playing service for your songs. More can be found on this page: Bass Session Playing – Click Here